There are 3 possible ways to access your email accounts hosted by Nucom Web Hosting. This post will walk you through getting setup.
WEBMAIL
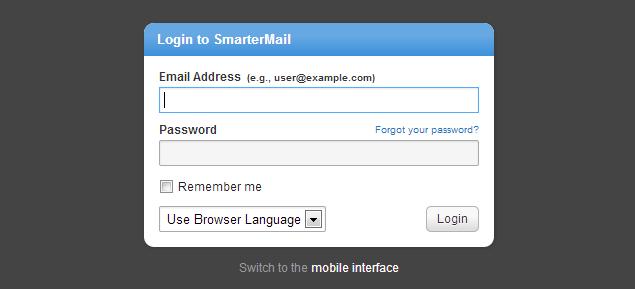
The first and easiest way to check if you email account and to see if they are setup / working properly is to check your account through the webmail interface. This is done as follows:
- Go to https://premium.fastmailserver.com
- Enter your email address and password.
PHONE ACCESS
Configure IMAP for iPhone or iPad
http://portal.smartertools.com/KB/a2659/configure-imap-for-iphone-or-ipad.aspx
The iPhone and iPad supports IMAP. IMAP will allow you to retrieve emails and folders from SmarterMail and leave the emails on the server.
Follow these steps to create a SmarterMail IMAP connection to an iOS device
On the iPhone, tap Settings.
- Tap Mail, Contacts, Calendars.
- Tap Add Account.
- Tap Other.
- Tap Add Mail Account.
- Complete the Name, Address (email address), Password and Description fields.
- Click Next.
- Ensure IMAP is selected.
-
Enter your incoming mail server information:
- Incoming Mail Server: premium.fastmailserver.com
- Username: full email address
- Password: same password used to access webmail
-
Enter your outgoing mail server information:
- Outgoing Mail Server: premium.fastmailserver.com
- Username: your full email address
- Password: same password used to access webmail.
- Tap Next.
-
The iPhone will attempt to establish an SSL connection to your IMAP and SMTP servers. If this succeeds, you will be done and can proceed to step 13. If this fails, you will see the prompt, "Do you want to try setting up the account without SSL?"
- Tap No.
- Tap Save.
- When prompted, "This account may not be able to send or receive emails. Are you sure you want to save," tap Save.
- Tap the account you just added (identified by your email address)
- Scroll down and tap the SMTP button.
- Select the server you just added, identified by the hostname from step 9.
- Select OFF for Use SSL.
- Select Password for Authentication
- Select 25 for Server Port.
- Tap the SMTP button to go back.
- Tap your email address to go back.
- Tap Advanced.
- Scroll down to Incoming Settings.
- Select OFF for Use SSL.
- Select Password for Authentication.
- Select 143 for Server Port.
- Tap your email address to go back.
- Tap Mail to go back.
- Tap the Home button.
- Tap the Mail App to check your configuration.
Configure IMAP for Android
http://support.toast.net/KB/a254/configure-smartermail-email-on-an-android-phone-or-tablet.aspx
MAIL CLIENTS
Configure Mac Mail with IMAP
http://portal.smartertools.com/KB/a2758/set-up-mac-mail-with-imap.aspx
IMAP is a protocol that keeps all messages and folders on the server. In addition, IMAP idle is an optional feature of the IMAP protocol that pushes all new messages to Outlook as they are received by the mail server. Unlike POP, IMAP offers two-way communication between your SmarterMail mailbox and your email client(s). This means when you log in to the SmarterMail Web interface, actions you performed on email clients and mobile devices will automatically appear in the Web interface (and vice versa). IMPORTANT: It is recommended that you avoid putting sub-folders under your Inbox as IMAP synchronization with most email clients is unreliable. This is a limitation of mail clients and NOT SmarterMail. While the SmarterMail web interface does allow you to create folders in your inbox, realize that those folders may not appear in your email client..
Follow these steps to set up Apple Mail to sync with SmarterMail via IMAP :
- On your Mac, open System Preferences.
- Click Mail, Contacts & Calendars.
- Click Add Other Account...
- Select Add a Mail account and click Create
- Complete the display name, full email address and password fields.
- Click Create.
- Type in premium.fastmailserver.com
- Click Next.
-
For the Incoming Mail Server
- Account type: IMAP
- Incoming Mail Server: premium.fastmailserver.com
- Username: (full email address)
- Password: This is your email account password.
- Click Continue
- If you receive an message stating "cannot sent your password securely to the server" click Continue
- For the Outgoing Mail server options fill in the required files: Outloging Mail server (premium.fastmailserver.com), and we require SMTP authentication so click Use Authentication and fill in with full email address and password
- Click Continue
- You will see an account summary page and now click Create
Mac Mail is now set up to send and receive emails using IMAP.
Configure OUTLOOK 2007
http://portal.smartertools.com/KB/a2662/configure-outlook-2007-imap-or-pop-account.aspx
For messages, users should set up an account within Outlook using either IMAP or POP3.
IMAP is a protocol that keeps all messages and folders on the server. In addition, IMAP idle is an optional feature of the IMAP protocol that pushes all new messages to Outlook as they are received by the mail server. Unlike POP, IMAP offers two-way communication between your SmarterMail mailbox and your email client(s). This means when you log in to the SmarterMail Web interface, actions you performed on email clients and mobile devices will automatically appear in the Web interface (and vice versa).
With POP3, your mail is saved in a mailbox on the remote server until you check your mail. When you check your mail, all of the mail is downloaded to your computer and is no longer maintained on the server. If you use POP3 and are traveling or check your mail from multiple locations, you will not be able to view any of your old mail because the messages only exist on the computer on which you originally received your mail.
Follow these steps to create an Outlook 2007 POP3 or IMAP account:
- In Outlook, go to Tools and Account Settings. Below the Email tab click New.
- Choose the email service you wish to configure: POP3 or IMAP.
- Select the manually configure server settings or additional server types check box. This will automatically enter in all of the required fields.
- Click Next.
- Click the Internet Email bubble.
- Click Next.
-
Enter the following information:
- Your Name: This is the display you want to use, such as Joe Smith.
- Email Address: This is your full email address, such as [email protected].
- Incoming Server: premium.fastmailserver.com
- Outgoing Mail Server: premium.fastmailserver.com
- Username: This is your full email address, such as [email protected].
- Password: This is your email account password.
-
If your mail server requires SMTP authentication, follow these steps. If you are not sure if your mail server requires SMTP authentication, please contact your hosting company or ISP.
- Click More Settings.
- Navigate to the Outgoing Server tab
- Select the My Outgoing Server requires SMTP Authentication checkbox.
- Click OK.
- Click Next.
- Click Finish.
Configure OUTLOOK 2010
http://portal.smartertools.com/KB/a2663/configure-outlook-2010-imap-or-pop-account.aspx
IMAP is a newer protocol that keeps all messages and folders on the server. In addition, IMAP idle is an optional feature of the IMAP protocol that pushes all new messages to Outlook as they are received by the mail server. Unlike POP, IMAP offers two-way communication between your SmarterMail mailbox and your email client(s). This means when you log in to the SmarterMail Web interface, actions you performed on email clients and mobile devices will automatically appear in the Web interface (and vice versa).
With POP3, your mail is saved in a mailbox on the remote server until you check your mail. When you check your mail, all of the mail is downloaded to your computer and is no longer maintained on the server. If you use POP3 and are traveling or checking your mail from multiple locations, you will not be able to view any of your old mail because the messages only exist on the computer on which you originally received your mail.
Follow these steps to create an Outlook 2010 POP3 or IMAP account:
- In Outlook, go to File, Click the Info tab
- Click Add Account
- Click Manually configure server settings or additional server types radio button.
- Click Next.
- Click the Internet Email radio button.
- Click Next.
-
Enter the following information:
- Your Name: This is the display you want to use, such as Joe Smith.
- Email Address: This is your full email address, such as [email protected].
- Incoming Server: premium.fastmailserver.com
- Outgoing Mail Server: premium.fastmailserver.com
- Username: This is your full email address, such as [email protected].
- Password: This is your email account password.
- Click Next.
-
If your mail server requires SMTP Authentication, follow these steps. If you are not sure if your mail server requires SMTP Authentication, please contact your hosting company or ISP.
- Click on More Settings.
- Navigate to Outgoing Server Tab
- Check "My Outgoing Server requires SMTP Authentication".
- Click OK.
- Click Next.
- Click Finish.